1. Getting Started
BerryShot is designed exclusively for macOS Sonoma (14.0) or later. The app leverages Apple's native APIs (SwiftUI, Apple Vision OCR, and Sandbox Security) to achieve maximum performance and minimum battery impact.
Core Capabilities
- Blazing Fast Captures: Trigger crosshair cropping instantly using customizable hotkeys. Region, full-screen, and app/window capture via ScreenCaptureKit.
- App & Window Capture: Capture individual windows or all open windows of an app in batch mode (Cmd + Shift + 7) with an aspect-ratio-matched preview window.
- Sensitive Content Redaction: Manual toolbar masks plus 100% offline automatic detection (secure fields, cards, API keys, emails, phone, custom terms) with strict policies.
- Local MCP Server: Private same-user stdio MCP server for local AI coding agents with read-only capture tools and guarded documentation sessions.
- Local OCR: Extract text from images without uploading to the cloud, utilizing Apple's machine learning in 0.1 seconds.
- AI Assistants: Query Xiaomi Mimo, OpenAI, Claude, Gemini, or OpenRouter to explain code, translate languages, or rewrite content with streaming responses.
- Live Meeting Transcription: Real-time speech-to-text from mic and system audio via Deepgram Nova or OpenAI Whisper. Generate AI meeting summaries with one click.
- Screen Recording: HEVC 60fps recording with system audio + microphone, pause/resume, dynamic region updates, and mic mute control.
- Cloud Storage: Upload to local directory, Google Drive, or custom API endpoints for shareable cloud links.
2. Installation Guide
To maintain standard integrity and prevent zip extraction friction, BerryShot is packaged inside a single mounted Disk Image (.dmg) file.
brew install --cask berryshotDownload DMG
Click the Download link on the homepage or header to download BerryShot.dmg.
Mount & Drag
Double-click the downloaded file and drag the BerryShot icon to your Applications folder.
Grant Permissions
Open BerryShot from Applications, and allow Screen Recording permissions in System Settings.
3. General Settings
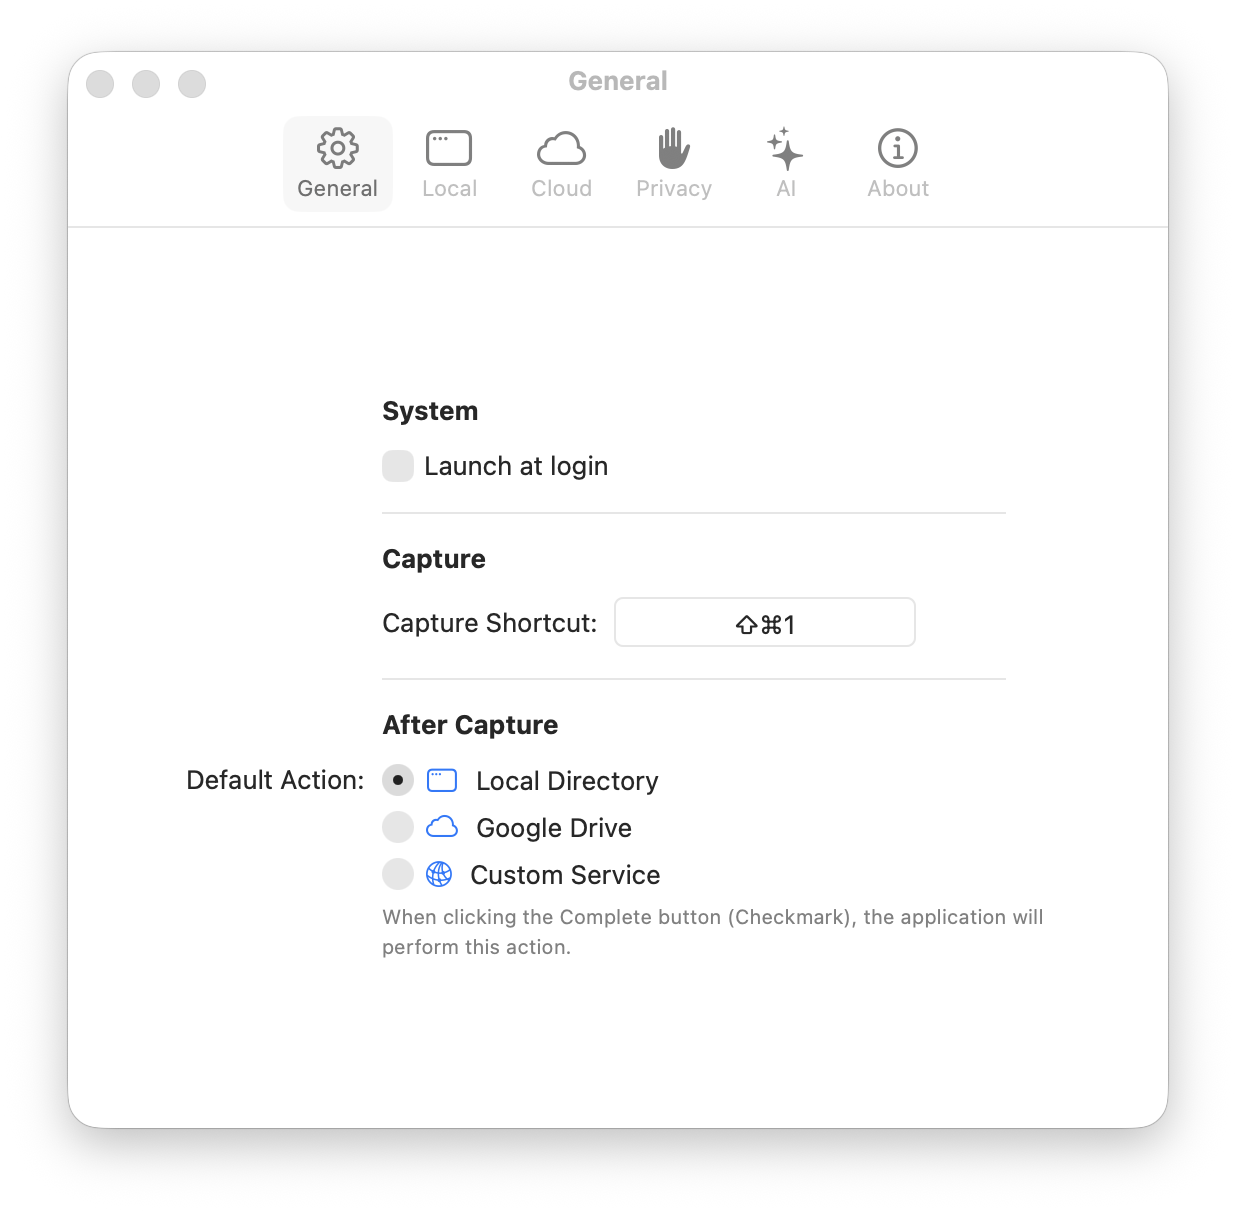
General configurations allow you to customize how the application interacts with your system, notifications, menus, and global keyboard shortcuts.
Global Shortcuts: Configure shortcuts for Region Capture (default ⌘⇧2), App/Window Capture (default ⌘⇧7), and Scrolling Capture (default ⌘⇧8).
Launch at Login: Automatically starts BerryShot in the background when your Mac turns on.
Play Sound Effects: Triggers camera shutters and success alerts upon screenshot saving.
Show Notifications: Displays transient banners showing cropped preview and action statuses.
4. App & Window Capture
In addition to freehand region selection, BerryShot provides dedicated single-window and multi-window batch capture for running applications.
Capture Modes & Workflow
- Press the default shortcut ⌘⇧7 (or select App/Window Capture from the Menu Bar).
- Use the dedicated selector tabbed between Apps and Windows.
- Choose a single target window or select an application to capture every eligible on-screen window of that app simultaneously in batch mode.
- Once capture completes, an aspect-ratio-matched preview window appears.
- Use ⌘C to copy to clipboard and auto-close, click Save... to choose a destination, or click Upload to send to your configured cloud provider.
5. Annotations & Drawing
Once a screenshot area is selected, the custom drawing toolbar slides out. You can annotate directly onto the frame before saving or sharing.
Annotation Tools
- Pencil Tool: Free-hand sketch outlines or doodles.
- Shape Blocks: Draw pixel-perfect circles, ovals, and rectangles.
- Direction Arrows: Point to UI elements to highlight details.
- Custom Text: Type explanatory labels onto the picture.
- Clear All: One-click button located next to Undo/Redo to remove all drawn shapes, text overlays, and redaction masks on the active capture at once (undoable via ⌘Z).
Visual Properties
- Stroke width: Tweak annotation lines from fine thin to bold thick.
- Palette presets: Choose high-contrast colors: Strawberry Red, Neon Green, Royal Blue, Mustard Yellow.
- Undo / Redo: Revert or re-apply individual strokes with standard macOS commands.
6. Sensitive Content Redaction
BerryShot protects sensitive information from being inadvertently shared or uploaded. Redaction operates through both manual canvas masking and 100% offline automatic detection.
Manual Redaction Toolbar
Select the Redact tool from the capture toolbar to manually draw masking regions over confidential areas. Choose between three mask styles:
- Blur: Softly defocus sensitive text or images.
- Pixelate: Mosaic pixel block overlay.
- Solid Cover: Opaque color block mask.
Automatic Detection (On-Device)
Powered by Apple Vision OCR and Accessibility APIs (no network calls), automatic redaction detects and obscures:
- Secure Text Fields: Password inputs and hidden inputs.
- Payment Cards: Credit/debit card numbers (Luhn-validated).
- API Credentials: API keys, tokens, and private key headers.
- Personal Info: Email addresses and phone numbers.
- Custom Terms: User-defined string matches.
Redaction Policy Strictness
In Settings → Privacy, each detection category can be toggled independently, and global strictness is governed by the Redaction Policy setting:
Automatic detection is disabled; only manual toolbar masks apply.
Highlights detected sensitive regions for review before saving.
Strict mode: blocks a capture outright rather than risk displaying unverified content.
7. Scrolling Capture
Capture entire webpages, long documents, or any scrollable content in a single stitched image. BerryShot automatically scrolls through the target window, captures each frame, and stitches them together seamlessly.
How to Use Scrolling Capture
- Press your capture shortcut (default: ⌘⇧2) to enter capture mode.
- Instead of drawing a region, click on the target window you want to capture.
- Click the Scroll Capture button on the toolbar or press S.
- BerryShot will automatically scroll through the content, capturing frames at each step.
- A progress indicator shows the current frame count and estimated completion.
- When complete, all frames are stitched into a single tall image.
Configuration Options
- Scroll Step: Lines per scroll event, default 8.
- Scroll Delay: Wait time between frames, default 0.12s.
- Max Frames: Safety cap at 150 frames to prevent infinite capture.
- Timeout: Total operation timeout of 120 seconds.
Sticky Header/Footer Stripping
- Sticky Header Height: Strip fixed navigation bars from stitched results.
- Sticky Footer Height: Strip fixed footers from the final image.
- Auto-Detection: BerryShot attempts to detect overlapping content for cleaner stitching.
8. Local Offline OCR
BerryShot stands out by executing optical character recognition (OCR) completely on your local device. Utilizing Apple's core Vision Framework, the app extracts text content in less than 100 milliseconds without internet latency or privacy leaks.
9. ChatGPT / Claude AI Explainer
Enhance your workflow by pairing extracted OCR text directly with Anthropic Claude or OpenAI ChatGPT models. When enabled, BerryShot sends the text along with prompt configurations to provide instant responses.
How to Set Up
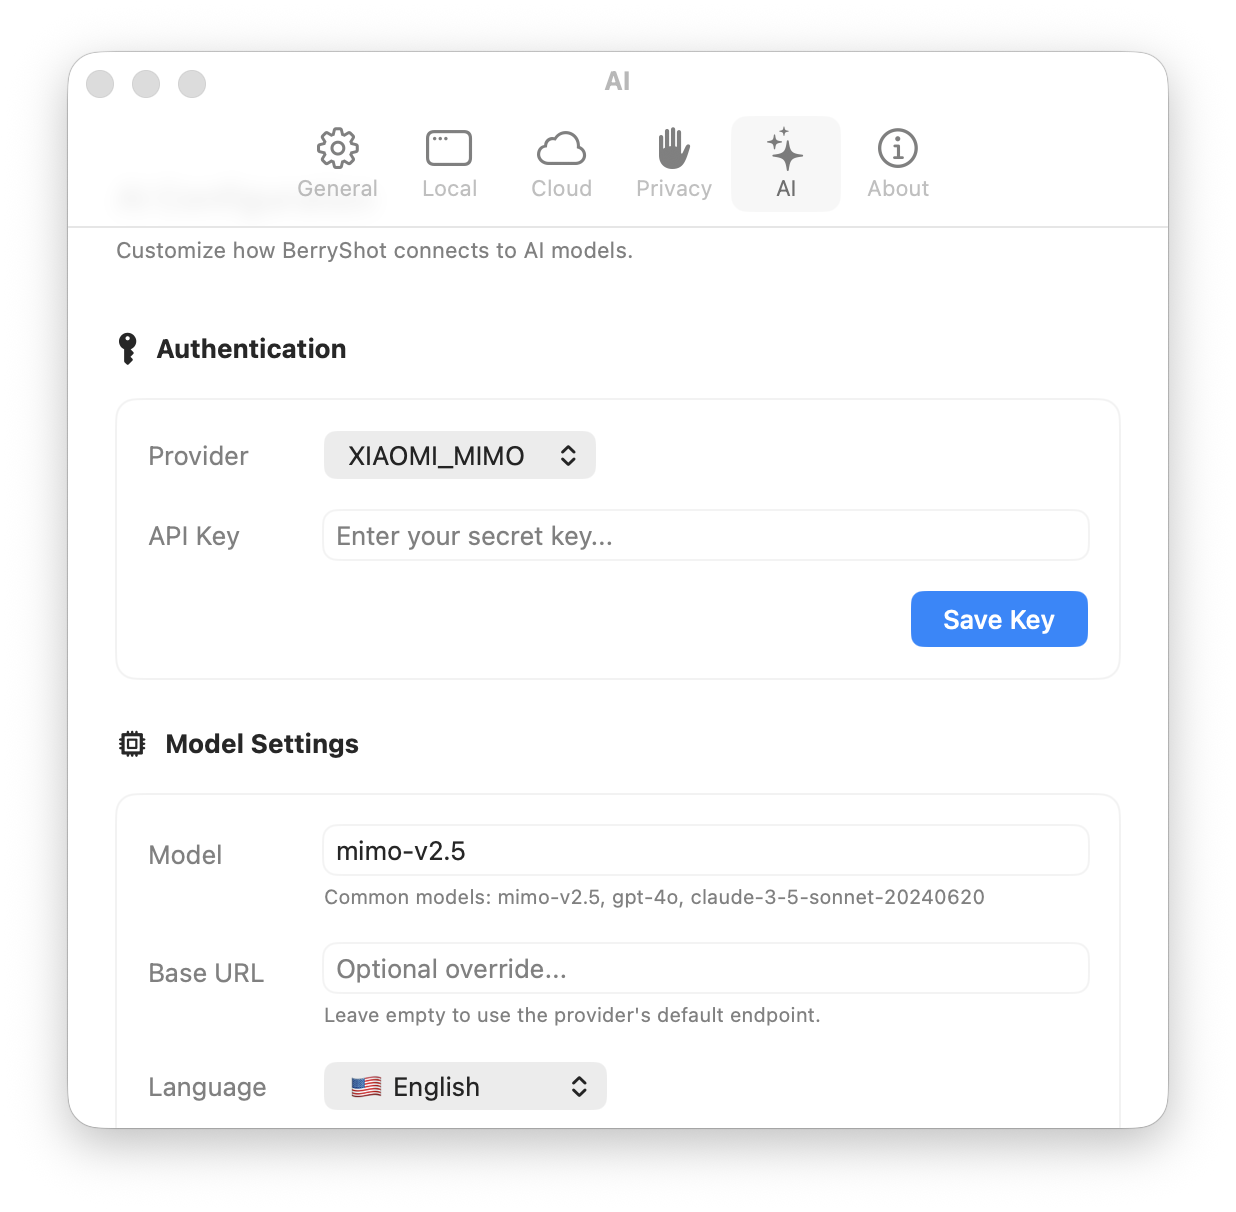
- Open Preferences / Settings (⌘ + ,) and switch to the AI Tab.
- In the Provider dropdown, choose Xiaomi Mimo, OpenAI, OpenRouter, Google Gemini, or Anthropic Claude.
- Enter your API key safely. The API key is stored securely in your macOS Keychain.
- Customize the model name, for example
mimo-v2.5,gpt-4o, orclaude-3-5-sonnet-20240620. - Set the Output Language: English, Vietnamese, or Japanese.
- Click Save Key to store your credentials.
10. Local MCP (Model Context Protocol) Server
BerryShot embeds a local stdio MCP server helper executable that allows local AI coding agents (Claude Code, Codex, or any MCP-compliant client) to discover, inspect, and capture BerryShot windows over a private same-user connection.
Tier 1: Read-Only Discovery & Capture Tools
- Application & Window Listing: List running applications and eligible windows.
- Redacted Window Capture: Capture target windows or apps with automatic/manual redaction applied.
- Manifest & Lazy Fetching: Returns bounded inline previews (long edge ≤960px) plus an artifact ID; full-resolution resources and OCR text are fetched lazily on demand.
Tier 2: Guarded Documentation Sessions
- Allowlist Application Lock: A session is strictly locked to a single allowlisted application.
- Safe Action Allowlist: Agent actions are limited to: press, show menu, increment, decrement, and set plain text field value.
- Policy Enforcement: Secure fields and destructive or external side-effect controls are automatically rejected.
- Persistent Menu Indicator: Menu-bar indicator displays active target app, mode, elapsed time, and includes a one-click Stop button.
11. Screen Recording
BerryShot includes built-in screen recording powered by ScreenCaptureKit. Record your selected region with HEVC codec, system audio, and microphone, all with annotation overlays preserved.
Start Recording
Click the red Record button on the toolbar or press R. Only the selected region is captured as a video file.
Pause & Resume
Press P or click the pause button. The timer stops and resumes with correct timestamp offsets.
HEVC 60fps Output
Records at 60fps using HEVC (H.265) codec at 50 Mbps for high-quality output. Supports Retina resolution via display backing scale factor.
System Audio + Microphone
Captures both system audio and microphone input simultaneously. Mute or unmute mic independently during recording.
Dynamic Region Update
Move or resize the selection rectangle during recording. The capture region updates in real time without stopping.
Auto-Open in Finder
After stopping, the saved .mov file automatically opens in Finder at the configured storage directory.
| Hotkey | Action | Description |
|---|---|---|
| Cmd + Shift + 2 | Region Capture | Enter capture mode and select a screen region (configurable in Settings → General). |
| Cmd + Shift + 7 | App/Window Capture | Open selector to capture a single window or all windows of an app (configurable in Settings → General). |
| Cmd + Shift + 8 | Scrolling Capture | Stitch scrollable content for entire webpages or long documents (configurable in Settings → General). |
| S | Scroll Trigger | Start auto-scroll stitching after selecting a target window. |
| R | Record | Start or stop screen recording for the selected region. |
| P | Pause / Resume | Pause and resume the active recording timer. |
| Enter | Confirm Capture | Save, copy, upload, or open the current capture based on settings. |
| Esc | Cancel Capture | Close the floating capture window. |
12. Live Meeting Notes & Transcription
Real-time speech-to-text transcription powered by Deepgram Nova or OpenAI Whisper. BerryShot captures both your microphone and system audio simultaneously, displaying live captions in a floating window during screen recording.
Step 1: Choose a Transcription Provider
Open Settings (⌘ + ,), click the AI tab, then scroll to Live Transcription.
| Provider | Latency | Cost | Note |
|---|---|---|---|
| Off (SFSpeech) | N/A | Free | Built-in Apple Speech, English only, not real-time |
| Deepgram | ~300ms | $0.0043/min | $200 free credit on signup. Best for Vietnamese |
| OpenAI Realtime | ~200ms | $0.006/min | Uses Whisper model via Realtime API |
Step 2: Configure API Key & Model
For Deepgram
- Create an account at deepgram.com.
- Go to API Keys in the Deepgram Console and copy your key.
- Paste into BerryShot's API Key field.
- Use model
nova-2ornova-3. - Click Save Key.
For OpenAI Realtime
- Get an API key from platform.openai.com.
- Paste an
sk-...key into BerryShot. - Model:
gpt-realtime-whisper. - Leave Base URL empty for OpenAI default, or enter a custom endpoint.
Step 3: Set Language
- Auto detect: let the provider detect language automatically.
- Vietnamese: optimized for Vietnamese speech.
- English: optimized for English speech.
- Japanese: optimized for Japanese speech.
Step 4: Start Live Transcription
- Press your capture shortcut or click Capture Region in the menu bar.
- Select the screen region you want to record.
- Click the Record button on the toolbar. This starts both screen recording and live transcription.
- A floating Live Meeting Notes window appears at the bottom-right of your screen.
- Your voice appears labeled as "You"; system audio appears as "Other".
Step 5: Generate Meeting Minutes
- While recording, or after stopping, click Generate Meeting Minutes.
- BerryShot sends the full transcript to your configured AI provider.
- The AI generates Summary, Key Discussion Points, Decisions Made, and Action Items.
- The result appears in a floating AI window with streaming text and one-click copy.
Live Meeting Notes Window Features
Real-time Streaming
Partial text appears as you speak and finalizes when you finish a sentence.
Two-Source Labels
Mic input = You in green, system audio = Other in blue.
Auto-Scroll
Window automatically scrolls to show the latest transcription.
Copy Transcript
One-click copy of the full formatted transcript with timestamps.
Always on Top
Floating window stays above other windows during your meeting.
Mic Mute Aware
Transcription pauses when you mute the microphone during recording.
13. Screenshot History
BerryShot automatically saves your capture history using SwiftData. Browse, search, and manage previous screenshots directly from the app without locating files manually in Finder.
History Features
Auto-Save
Every screenshot is automatically saved to history with timestamp metadata.
SwiftData Storage
Uses Apple's modern SwiftData framework for efficient local persistence.
Quick Access
Access history from menu bar to re-copy, re-upload, or delete past captures.
Sorted by Date
History is sorted newest-first with creation timestamps for easy browsing.
14. Cloud Upload Configuration
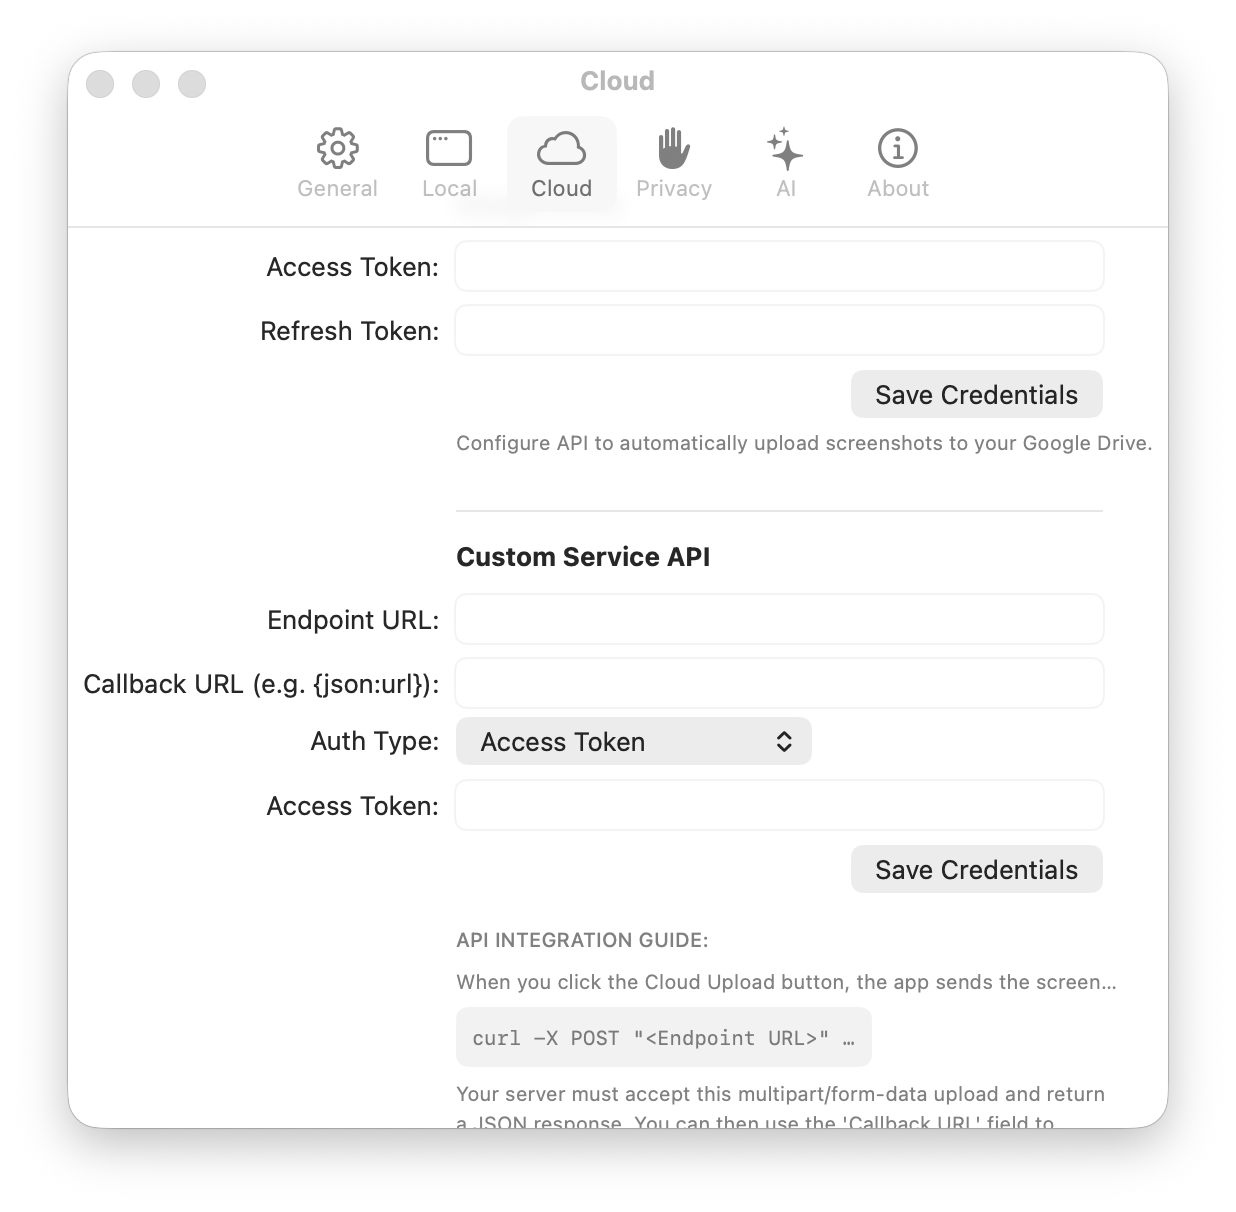
Easily share screenshots and recordings by configuring your preferred storage destination. BerryShot supports local directory output, Google Drive, and custom service endpoints.
Local Directory (Default)
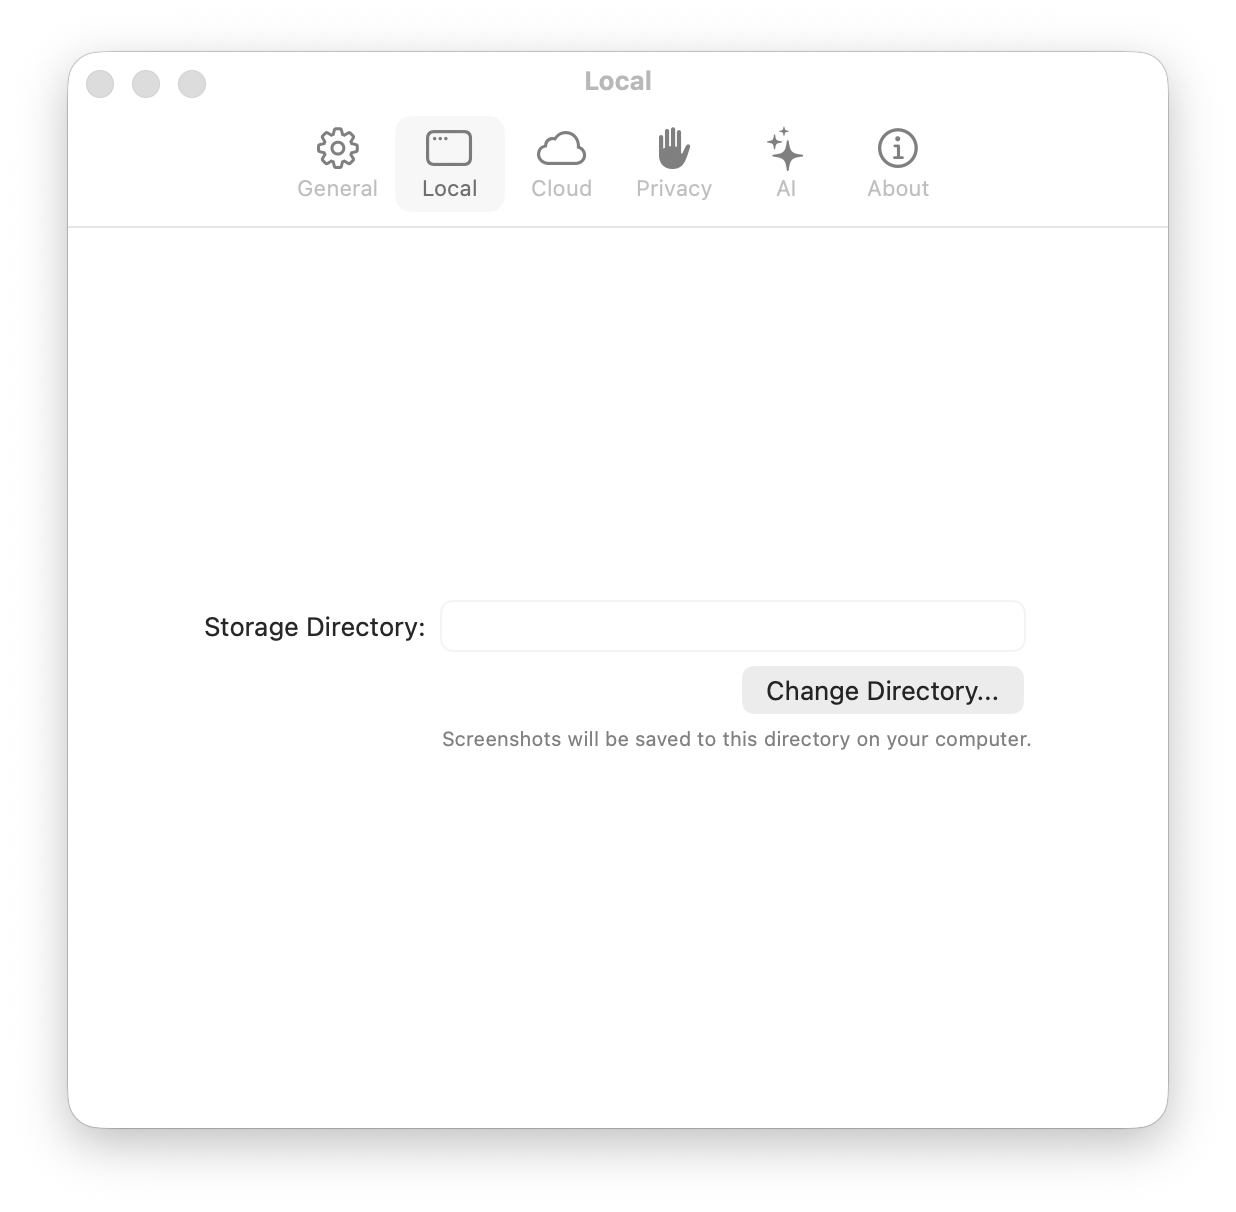
Saves files to ~/Library/Application Support/BerryShot/. Click Change Directory to select a custom folder.
Google Drive
Enter OAuth Access Token and Refresh Token. Files are uploaded via Google Drive API v3 and a shareable link is copied to clipboard.
Custom Service API
Upload to any custom endpoint. Supports bearer access token or API key + secret authentication, endpoint URL, and callback parsing.
15. Privacy & Permissions
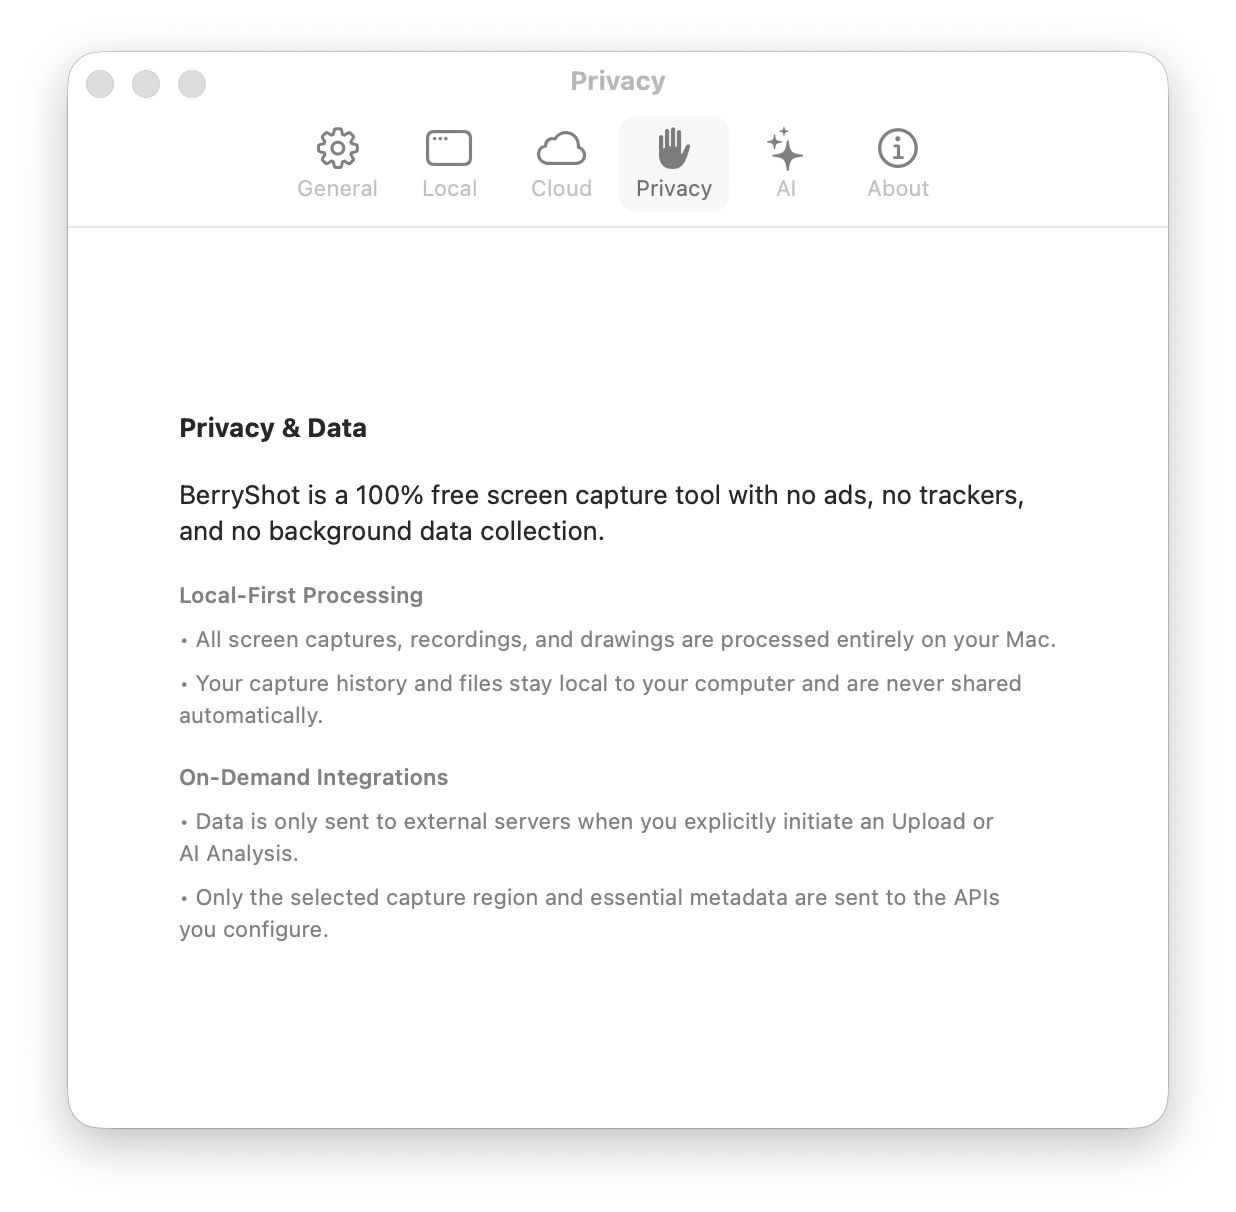
Because BerryShot captures your screen and audio, macOS enforces strict security access checks. You must explicitly authorize the required permissions before the app can function.
Screen Recording Permission
Required for screen capture and recording. Navigate to System Settings - Privacy & Security - Screen Recording, and toggle BerryShot ON.
Microphone Permission
Required for live transcription and screen recording with audio. Navigate to System Settings - Privacy & Security - Microphone, and toggle BerryShot ON.
16. Support & Contact
If you run into issues, have feature proposals, or require business assistance, please email our support address.
Contact Developer Team
We respond to email inquiries within 24-48 business hours.
API Keys
Store OpenAI, Claude, Gemini, Deepgram, OpenRouter, Xiaomi Mimo, and custom provider credentials in macOS Keychain.
Local by Default
OCR, history, and local saves stay on device unless you choose upload, AI, or realtime transcription.